- Theme Packs
- Themes
-
Preschool Planning
- Preschool Teachers
A Preschool Christmas Theme:
Let's plan for the holidays!Welcome to the preschool Christmas Preschool Theme Page!
This is a holiday theme that offers activities for your preschool classroom as you explore family traditions together!
It is such an exciting time of year and an exciting theme!
Your preschoolers will learn about each other's family traditions which brings about so many opportunities for cooking, art, decorating and learning about giving to others in this Christmas Preschool theme.
You'll find more themes to help you with your planning on my preschool themes page.
How To Plan Your Preschool Christmas Theme
This time of year (and this theme!) can overstimulate the senses in your preschool classroom due to all of the lights, colors, aromas and general excitement that the children bring to the season!
I recommend "easing" into this theme over a period of weeks. Take your time decorating and "theming" your room over this time period rather than having it all available all at once.
Preschoolers are bombarded with lights, hustle and bustle, aromas and more as they shop, wrap presents, visit with family and attend holiday parties throughout the month.
Taking the time to explore the different aspects of this time of year can help give your preschoolers some perspective and understanding to it all!
This Christmas Preschool Theme page is filled with secular (or non-religious) activities and ideas for all areas of your classroom. Let's ease into our Holiday Theme planning!
You can either scroll down through this page to see all of the preschool lesson plans and activities for your theme or click the link below to go to specific preschool activity types you are looking for.
Preschool Christmas Theme Activities
Christmas Preschool Theme Art
Home Made Christmas Wrapping Paper
Materials Needed: Plain paper (not construction paper); Christmas theme stamps, stamp pads, watered down white glue and brushes (or glue sticks), glitter
Encourage children to print their own names on their paper. Children stamp their paper with the stamps. They can then randomly brush watered down glue (or randomly "color" in spots on the paper with glue sticks) and sprinkle the paper with different colors of glitter.
Let dry. Use to wrap the present they make for their parents). Click here for Gift Ideas
TIP: We have used white wrapping/tissue paper for this each year. Another TIP: When done sprinkling with glitter, "empty" the excess glitter onto a tray. Put all the excess glitter into an empty glitter bottle so that you have multi-colored glitter for the future!
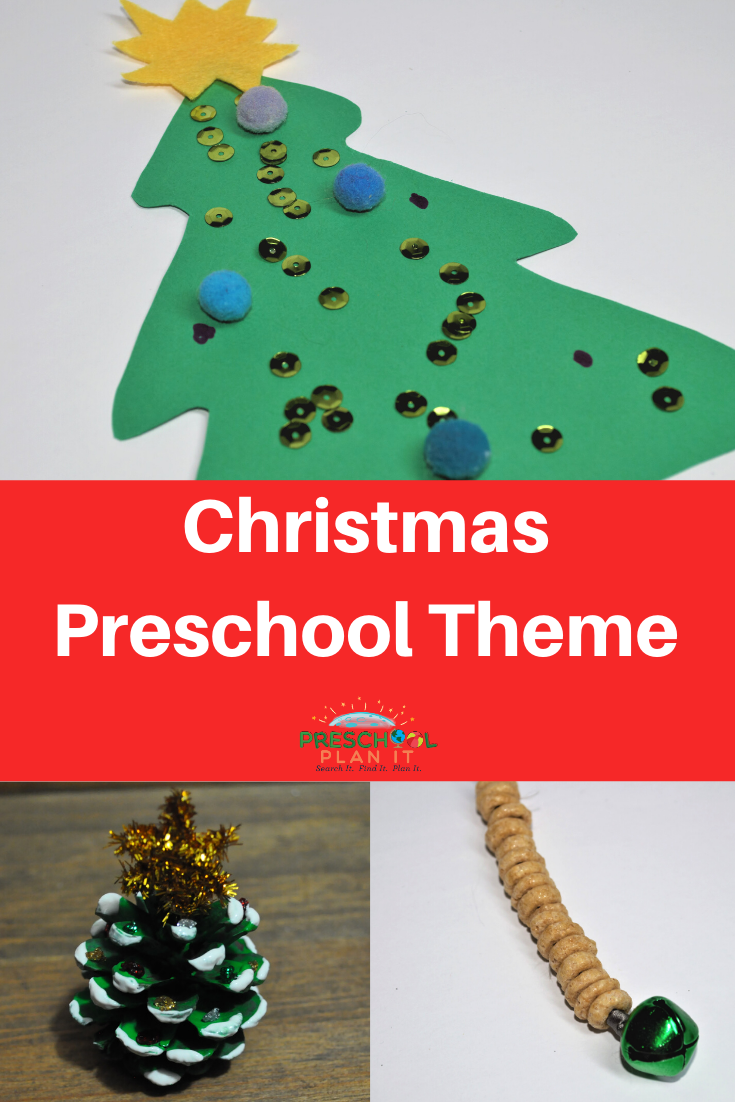
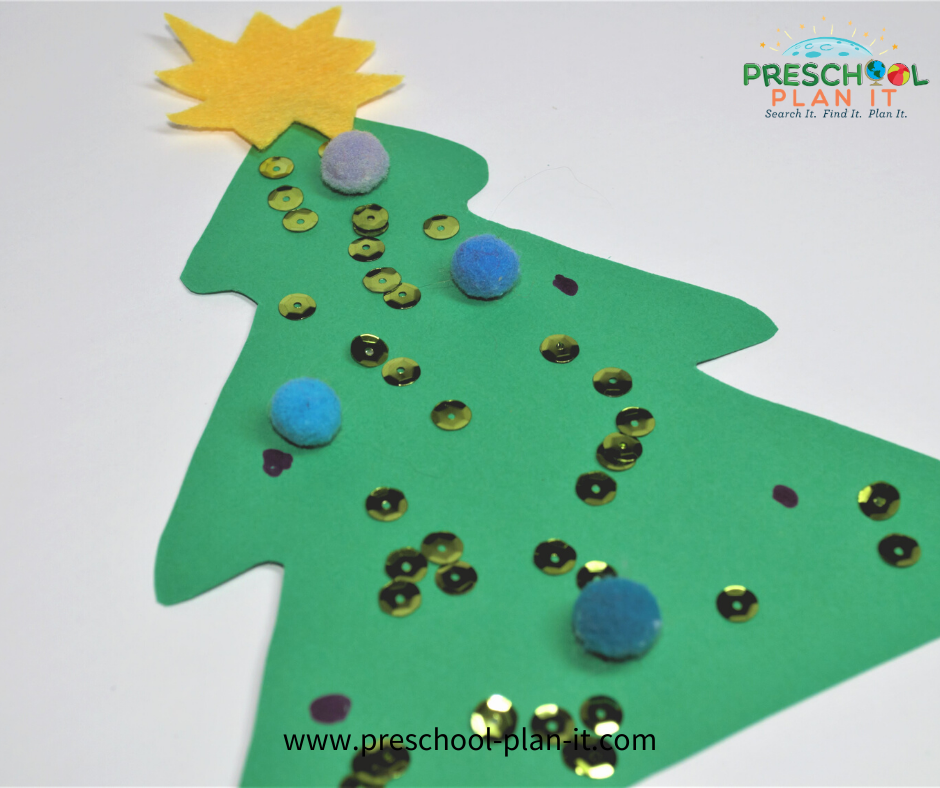
Trees
Materials Needed: pre-cut Christmas trees (from green paper); miscellaneous items to decorate--sequins, glitter, yarn and fabric scraps, glue, scissors
Hole punch the top of the tree so that you can hang the trees in your classroom when complete.
The children decorate the trees--BOTH SIDES!--with the materials you have provided!
Gingerbread Stick Puppets
Materials Needed: Gingerbread people shapes; small pieces of fabric and ribbon, buttons, sequins, pasta--any items you want to use for decorating!; large craft sticks, glue
Encourage children to print their name on the large craft stick with a marker. Allow them to decorate their gingerbread person any way they want! Glue stick onto back. Let dry.
EXTENSION: Children can use these when you read the story Gingerbread Baby by Jan Brett. They can repeat the refrain phrase of "You can't catch me!".
Rudolph Antlers
Materials Needed: Long, brown, wide (about 3" wide) paper for headbands; 1 piece of brown construction paper per child; glue sticks.
Encourage children to print their name on their headband strip. Help children to fold their paper in half and trace their own hand. Encourage them to cut out their hand print as best they can! They should glue their hand print antlers to their headband. Play the song Rudolph the Red Nose Reindeer while they work on their antlers.
EXTENSION: Use their antlers to act out the song at circle time! (See Circle Time activity below).
Wish List Collage
Provide Christmas catalogs and sales papers from newspapers for the children to cut out and glue onto their wish list collage to bring home!
Christmas Preschool Theme Block Center Ideas
Stack the Presents
Wrap some of your blocks with Christmas wrapping paper and place them in the block area. Stack the presents! Be sure to encourage counting, sorting by color, type, size, etc.
TIP: I recommend wrapping one of the blocks with the children so that they KNOW that they are not actual presents! We have tried just placing them in the block area and telling them that they are just the blocks wrapped up, but- preschoolers are curious! Be sure to have additional paper and tape available for the times when the blocks do get unwrapped anyways!
Extension: Provide tape and paper and let the children try wrapping blocks!
Extension: When you are ready to change out your block area with different blocks, have an "unwrap the block party" by letting the children unwrap all the blocks!
Home Made Themed Blocks
Ask families (or provide your own) to donate empty boxes--cereal boxes, other food boxes, etc.) and wrap them up for the block area.
Ribbons and Bows
Provide ribbons and bows to the block area. Encourage children to tie up blocks with the ribbon, put bows on the blocks, etc.
Cozy Fireplace
The children can use blocks to build a fireplace! Provide Christmas books, bean bag chairs and pillows for them to snuggle by the cozy fire they build while reading some books!
EXTENSION: Encourage the children to cut or tear yellow, red and orange paper into flames to tape to the front of their fireplace!
Themed Circle Time Ideas
Circle Time is such a great time for children to learn the social skills of being together as a large group AND to learn more about your Christmas Theme!
What is Christmas?
Materials Needed: Large chart paper, marker
Expect a lot of excitement over this discussion! Once you ask them "What special holiday happens this month, in December?"! Because of the excitement this will produce, you may want to restate your circle time rules about listening. We use the following:
"Eyes are on the teacher."
"Ears are listening."
"Voices are quiet."
"Your hand is up like this when you want a turn to talk."
Remind them that we all need to be patient--wait quietly--for our turn to talk so that EVERYONE has a chance to say what they want to say!
Ask the children what they think Christmas is?
List ALL of their answers. The typical ones that you can expect are "Santa comes." "We get presents." "I want a _________."
After their list, make your own suggestions to go past the present stage! Some suggestions are:
Giving gifts to others; making and mailing cards; cooking special foods (such as cookies, cakes, breads, etc.).
We also, after all the excitement, tell the children that Christmas is the time of year that we think more about helping others and doing things for others. Perhaps you can talk about Holiday Service Projects that you'll be working on.
Countdown Chain
Materials Needed: Strips of green and red construction paper numbered 1-25. Draw a solid, black line 1" in from one end of each strip; scissors for each child.
Show the children a calendar and count from December 1 through December 25. Tell them that there are 25 days until Christmas and that they are going to help you to make a chain of papers to count down "how many more days" until Christmas.
Give each child one of the strips of paper and a pair of scissors.
Have them cut the solid line. Tell each child to tell what number is on their paper.
Ask for the numbers, one at a time, from one to whatever number children you have.
"Who has number 1? It looks like this? Great. May I have it please?". Tape the strip in a circle with the number "1" on the outside.
"Who has number 2? It looks like this? Great! Please put your strip of paper inside the whole of this chain!" Help that child to place their strip into the whole of the chain piece you just made. Be sure the number 2 will be facing out. Have that child sit back down. Tape the number 2 into a link of the chain.
Continue with all the numbers until you are done. We have 16 children in our class. So, we have numbers 17-25 already pre-cut and ready to go on the chain.
After all of your children's numbers are on the chain, encourage them to help you count to finish the chain.
"OK. So we have 1, 2, 3, .....16. Here is number 17 (tape into chain), what's next? Right 18, etc.
Tell the children they are going to take turns tearing one number off each day. When all the numbers are ripped off, it will be Christmas. Choose one child to tear off the number 25 now (and more if it is later than December 1st!).
TIP: Have a Christmas Chain Helper job list. Write each child's name on the list so that you don't forget to give each child a turn each day to rip off a chain. We taped the list of names on the wall next to the Christmas Countdown Chain.
Another TIP: We found that the children were not sure how to "tear" the chain off! They tried pulling and shaking, but weren't sure how to tear! This is a GREAT fine motor skill to work on! You can, at your next circle time, provide scraps of paper to "teach" them how to tear, or provide a tearing art activity (see Art Activities above for this activity)
Rudolph the Red Nose Reindeer-LIVE!
Materials needed: Reindeer Antlers (either purchased from a dollar store or their hand made antlers from the art activity above); red and white Santa hat and a red clown nose; your favorite version of the Rudolph song; bell instruments (optional).
Play the song as the children come to circle time wearing their antlers. Choose one child to wear the Santa hat and several children (4 or 5) to be the "other reindeer". Tell them they are going to "act out" the song. Assure the children that you will all sing it another time so that ALL the children have a turn to be in the play! The children not chosen to be reindeer each time could be given bell instruments to shake while they sing along.
Have fun with it!
Stars
Materials needed: large, yellow star made in advance. Pass the star around as you sing "Twinkle, Twinkle, Christmas Star". Just replace the word "little" in the traditional song with the word Christmas.
EXTENSION: The children may want to make their own Christmas star! You can provide yellow paper at the writing table that have pre-drawn stars for them to cut out and place stickers on! Another place would be to have yellow paint at the easel for them to paint and you can cut them into stars when they are dry.
Finger plays
Peppermint Stick
I took a lick of my peppermint stick (Hold candy cane and pretend to lick).
I thought it tasted yummy (Rub belly)
It used to hang on my Christmas Tree (Pretend to hang on tree)
But I like it better in my tummy! (Rub belly again).
Five Little Bells
Five little bells all hanging in a row (Wave one hand with fingers extended)
The first one said "Ring me slow" (Wiggle thumb)
The second one said "Ring me fast" (Move pointer finger fast)
The third one said "Ring me last" (Move Middle finger).
The fourth one said "Ring me like a chime" (Move ring finger)
The fifth one said "It's Christmas Time" (Move pinky finger)
This is Christmas (sung to Twinkle, Twinkle Little Star)
What is Christmas?
We'll tell you.
It's putting love in all you do.
In our work and in our play.
In everything we do each day.
It is showing love for others,
Mother, Father, Sisters, Brothers.
Old MacDonald (sung to Old MacDonald)
Old MacDonald had a Christmas tree--
Ho, ho, ho, ho, ho.
And on that tree he had some horns (blow horns)
Ho ho ho ho ho!
With a toot toot here and a toot toot there
Here a toot there a toot Everywhere a toot toot............
Other verses: lights---flash flash bells---ring ring birds---tweet tweet drums--boom boom stars---twinkle twinkle candy canes----yum yum
Extension: It was suggested to make this into a flannel board story! What fun that would be in the Library area!
Gingerbread Man
Stir a bowl of gingerbread (Pretend to stir a bowl of batter) Smooth and spicy brown. Roll it with a rolling pin (Pretend to roll) Up and up, then down.
With a cookie cutter (Pretend to stamp) Make some little men. Put them in the oven (Pretend to open and place in oven) Until half past 10!
Extension: This would be a great finger play to say while making gingerbread, or before reading the story The Gingerbread Baby by Jan Brett.
Snack Recipe Ideas to Cook Up for Your Preschool Christmas Theme!
Cooking with children helps develop their math skills and helps them to learn how to follow directions. It also allows for some great conversation! Ask many questions while cooking with your children to encourage conversation! Be sure to ask specific Christmas theme questions while making these fun snacks!
Egg Nog
Ingredients and Items needed: 4 eggs, 2 tsp vanilla, 4 tbsp honey, 4 c. milk, nutmeg, wire whisk, large bowl, measuring cups.
Divide up ingredients so that each student puts something into the bowl. Have one child shake a few shakes of nutmeg in*. Have each child take turns stirring. Teacher finishes by whisking so that everything is mixed. Serve cold.
CAUTION: Be sure to check for allergies. Nutmeg is considered a "tree nut" so do not use this if you have any tree nut allergies. Also, check for egg allergies or lactose intolerance prior to making with the children.
Hot Chocolate
Ingredients and Items needed: Instant hot chocolate mix, milk or water (depending on package you use), mini-marshmallows.
This is always a great treat on a cold winter day! Combine this with a Pajama Day--Invite the children and teachers to wear their pajamas to school this day!
Reindeer Pudding
Ingredients and Items needed: Mini graham cracker crusts for each child, chocolate pudding mix and milk (it takes approximately 1 cup of pudding for each mini pie); cheerios cereal, pretzel twists; maraschino cherries (1 for each child); bowl, plastic measuring cup, 1 plastic spoon per child.
Prepare instant pudding with the children. Scoop 1/2 to 1 cup of pudding into mini pie shell. Add 2 pretzel twists (for antlers); add 2 cheerios for eyes and 1 cherry for nose!
Candy Cane Cookies
Ingredients: Sugar cookie dough; red food coloring; wax paper
Mix half the cookie dough with red food coloring.
Show children how to roll dough into snakes on the wax paper (we tape wax paper on the entire table so it does not slip off). Give each child a small amount of white and of red cookie dough to roll into a snake shape.
Help them to twist them (somewhat like a braid) to make a Christmas Candy Cane.
Bake in a 350 degree Fahrenheit oven for approximately 7 minutes.
Christmas Punch
Materials needed: Large bowl, fruit punch juice, ginger ale, frozen fruit, such as strawberries.
Mix 2 parts juice to 1 part ginger ale. Add fruit. Stir and serve!
Sugar Cookies
Of course, cookies are a tradition at this time of year! Bake in advance some sugar cookies from refrigerated cookie dough, or make your favorite cookies with the children!
Provide frosting and decorations!
Preschool Christmas Theme Ideas to
Transform Your Dramatic Play AreaGift Wrap Station
Materials Needed: Table; tape; wrapping paper; bows and ribbon; boxes (cereal boxes, empty boxes of different sizes--you can even use blocks from your block area!).
Help children to wrap "present" boxes!
Reindeer Farm and Barn
Materials needed: A recycled box to section off your drama area (some teachers have used a rope or ribbon to section off--be cautious with this as the children can get hurt if they are "running" as reindeer back and forth under the ropes--they can get hurt); a sign that reads "Reindeer"; hay; blankets for the reindeer; antlers (purchased at a craft or dollar store or made out of construction paper--see art activity above); play food such as carrots and other vegetables; bowls for pretend water; hay.
Preschool Christmas Themed Ideas for your Easel--
More Than Just Painting
(Although that is always THE favorite in our classroom!)Paint and Bows
Mix the paint at your easel with a little bit of watered down white glue. Provide different lengths of cut ribbon. Let the children paint and decorate!
Painting
Materials Needed: Tempera Paint and brushes. Instructions: NONE!
That's right, none! Remember that just because we have a set Christmas theme for a week or more, does not mean that ALL activities have to revolve around it! Children at this age are beginning to experiment with representational pictures, but are not quite there yet! Be sure to allow activities where they can just explore and use materials such as painting just to paint and cutting paper just to cut paper!
Preschool Christmas Themed Large Group Games
that help build their muscles while they have fun togetherPut the Present in the Box Relay
Materials needed: Different size boxes, toys from the classroom.
Keep this activity as a supportive activity, not competitive. Do this by having the children encourage the person whose turn it is.
The children start at one side of the room. They choose a toy and run to the other side of the room where you have the different size boxes. They find a box that best fits their toy, places the toy in and brings the box back to the beginning. Then the next child does the same.
Bouncing Presents
Materials needed: Parachute or large blanket; soft blocks
Children hold parachute or blanket. Work with them to show them how to move the chute up and down together. Place soft blocks in the middle of the chute. Encourage the children to Bounce the Presents off!
Parachute play is a great time to make up stories while you move and shake it! Example: "We are all walking in the store and shopping for Christmas presents. (moving chute slowly). But, the store is closing soon so we have to hurry! (move chute fast up and down). Phew, we are done shopping. (move chute slowly) Now we have to wrap the presents quickly so we can deliver them! Hurry, wrap, wrap, wrap! (move chute fast). Wow, we got a lot done! (Move chute slowly). Let's see how many we have! (stop moving chute and hold still). Let's count (count with children as you toss the blocks onto the chute). Now, it's time to deliver them all! Let's bounce the Christmas presents off until they are all gone and delivered! Ready....GO!
NOTE: We find that when we bounce anything off the parachute, children stop using the chute and chase after the items. To avoid them all running after them, tell them that 3 of them will be the Elves to collect the presents AFTER they are all off the chute! When they are all off the chute, tell them to freeze! Say "Elf Jimmy, Elf Sarah, Elf Owen--please find our presents!" They collect them and put them back on the chute.
"Deliver" them again and assign new elves!
Hold on--Do you want a week-long Christmas Theme?
With a completed weekly planning form, daily planning forms and printables?
I've got you covered!
Take a week off from planning!
Click here to learn more!Library and Literacy
Preschool Christmas Theme Ideas for Your Library
Book Suggestions for the Library
There are so many books to choose from! Here are some of my favorites. Click on the titles of the books to see what Amazon has to offer if you can't find them at your local library!
(I LOVE Amazon, and some of the links below will take you to the Amazon website. If you do choose to purchase yours through Amazon, they do send me a few cents--which supports my coffee habit! )
Christmas Mice! by Bethany Roberts
Curious George Christmas Countdown (CGTV Tabbed BB) by Tish Rabe
December by Eve Bunting
Gingerbread Baby by Jan Brett
How the Grinch Stole Christmas! (Classic Seuss) by Dr. Seuss
If You Take a Mouse to the Movies by Laura Numeroff
Merry Christmas, Stinky Face by Lisa McCourt
Maisy's Snowy Christmas Eve by Lucy Cousins
Merry Christmas: Big Hungry Bear! By Audrey Wood, Don Wood by Audrey Wood and Don Wood
Merry Christmas, Mouse! (If You Give...) by Laura Numeroff
Merry Christmas, Spot! by Eric Hill
The Mitten by Jan Brett
The Puppy Who Wanted a Boy by Jane Thayer
Rudolph the Red-Nosed Reindeer or Your favorite version!
Where is Christmas, Jesse Bear? by Bruce Degen
Library Wall Christmas Theme DecorHang fronts of Christmas cards on the wall. Also include pictures of Christmas trees, printed pictures of actual Christmas lights that you have taken pictures of and pictures of families together.
Obtain toy catalogs for the children to look at (such as Toys 'r Us and other toy store brochures). Also, this is a great time to place those catalogs that you receive multiples of each year!
Preschool Christmas Themed Activities
to Help Your Preschoolers Develop Math Skills
and the Small Muscles in Their Hands!Christmas Card Sorting
Provide different Christmas cards for the children to sort. You will be amazed at how they sort them--by pictures (trees, snow, toys, etc.) and by size and color!
Christmas Tree Match Game
Provide pairs of Christmas tree pictures with varying shapes for the children to match.
Christmas Card Match Game
Provide the children with a matching set of Christmas cards to match up. Cards can usually be purchased for $1.00 per box at a local dollar type store. Purchase 2 boxes.
Glitter Dough
Combine 1 cup flour, 1/2 cup salt, 1 cup water, 1 tablespoon vegetable oil and 2 teaspoons cream of tartar. Cook for 3 mins. or until mixture pulls away from the pan. Sprinkle glitter on top of a table top. Let the children work the glitter into the dough. Children can made cookies and candies out of the dough.
Christmas Bird Feeder Garland
Here's a Christmas gift your little ones can make for our fine-feathered winter friends!
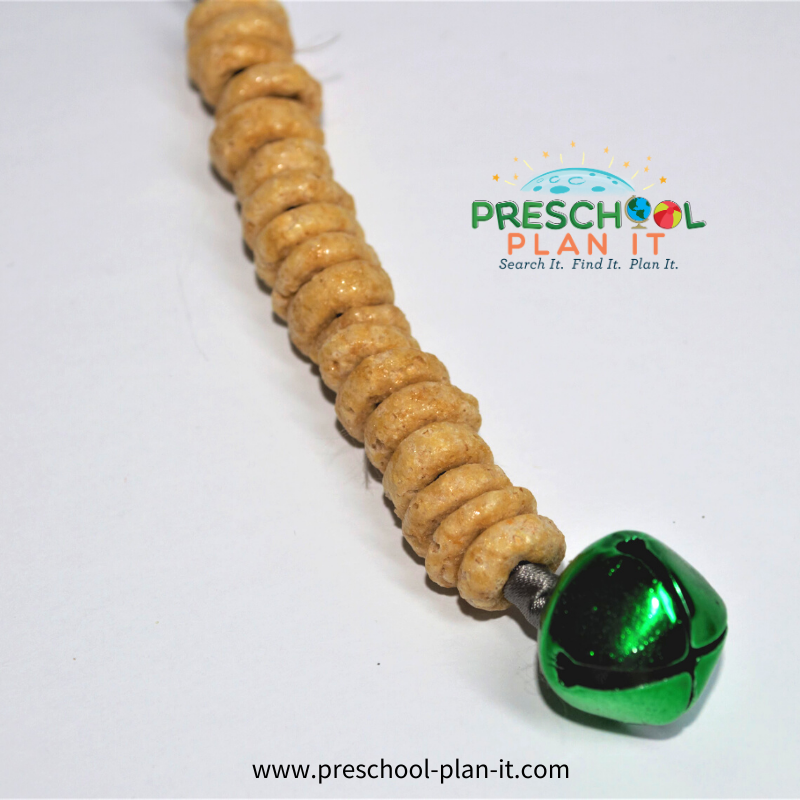
Materials Needed: Ribbon; 1 jingle bell per child; Cheerios or other round cereal.
To make a bird feeder, tie a jingle bell onto one end of a length of ribbon. The children then string Cheerios® on the ribbon. Tie the bird feeder to a nearby tree and listen for the bell!
Season Game Matching
Provide pairs of pictures that represent the season for the children to match!
Name Sorting Cards
Provide the children's name tags that you use during the day OR have the children print their name on a strip of paper.
Encourage children to sort the cards by different attributes such as:
by gender by number of letters in a name by names with a specific letter in the name by names that BEGIN with a specific letters by names that END with specific letters by names of children with blue eyes
Preschool Christmas Theme Music and Movement Activities and Ideas To get your Preschoolers Movin' and Groovin'!
Jingle Bell Freeze Dancing
Materials Needed: Christmas songs on CD, wrist bells (one for each child); large, open space!
Play a game of "Freeze Dancing" with them using Christmas Jingle Bell instruments! Provide the children with a bell instrument (wrist bells work best). Tell the children that they can dance, sing and play their instruments along with the song and when the music stops, they should FREEZE and stop shaking their bells!
Peppermint Stick
Action Poem!
I took a lick of my peppermint stick (lick a pretend candy cane).
I thought it tasted yummy! (rub belly).
It used to hang on my Christmas Tree (pretend to hang on a tree).
But I like it better in my belly! (rub belly again)
Let's Move!
Cut out pictures of toys or items the children like and encourage them to move like those items (such as an airplane, a puppy, etc.).
Sharing a Christmas Toy
Introduce a new toy for the classroom by singing this song to the tune of London Bridges:
Here's our Christmas toy, let's all play; let's all play; let's all play. Here's our Christmas toy, let's all play; let's share the toy together.
VARIATION: Instead of presenting a new toy, choose several toys from your classroom and change the verses. Use items such as block, paintbrush, etc.
Christmas Song Sing-Along
Don't forget to just have an old-fashioned sing along throughout the day with traditional Christmas songs. It's fun to hear how some of the words are sung by the children. We recently asked "What IS a one horse open sleigh anyway???!" and then we started investigating what that meant! This turned into a new stable--for reindeer, horses, sleighs, blankets, a wagon and children taking friends for rides in their Preschool one (or two or three!) horse open sleigh!
Preschool Christmas Theme Activities for Your Sand and Water Table!
It's Snowing!
Materials needed: Ivory Soap bars, shaved into pieces; warm water; toilet paper!
This has also been called clean mud! Have the children squish these items together to make some great snow!
Yummy Christmas
Materials Needed: Water table, water, Christmas scent (vanilla, peppermint, etc.) Add Christmas sink or float items such as ribbons, small jingle bells, teddy bear sorters, etc.
VARIATION: Instead of Christmas sink or float items, simply add measuring cups and spoons and let some counting or pretend cooking happen!
EXTENSION: Add some dobs of shaving cream for them to mix in! Add some metal whisks and egg beaters and let your chefs go to town cooking!
Ribbons and Bows
This table is a great place to add ribbons, bows, Christmas colored paper and scissors to practice cutting at! Save their cuttings for collage projects at the easel or art table.
A Snowy Christmas
Materials needed: Shaving cream *(see note below); small, plastic houses, cars, people, sleigh, reindeer, trees, etc.
Children can pretend it is Christmas or Christmas Eve and have all the cars drive to their homes in the "snow", the reindeer and sleigh fly over the houses, etc.
NOTE: *Use NON-menthol shaving cream. The menthol scented shaving cream is extremely strong for the senses.
Preschool Christmas Theme Science Activities--
for your Preschool Scientists in Training!Explore the Season
Materials Needed: Pine branches, pine needles, pine cones, magnifying glasses
Dancing Raisins
This is a classically fun experiment! And with raisins being used in so many cooking activities this time of year, why not check them out!
Materials needed: glass jar, 1/2 cup water, 1/4 cup vinegar; 1/2 tsp baking soda
Mix the water and vinegar in the jar. Slowly add the baking soda, a little at a time Drop the raisins in and watch what happens!
Other items to use instead of raisins: dry pasta noodles (broken into small pieces), small pieces of cooked spaghetti; drinking straw cut into small pieces; dried peas
EXPLANATION: The vinegar and baking soda form gas bubbles which attach to the item in the water. These bubbles make the items lighter and cause it to rise or float until the gas bubbles burst and it falls. The bubbles will then attach again to the time and rise it again!
EXTENSION: Provide the children with plastic safety goggles and a plastic spoon and their own jar and items! They can work alone or in teams to try the different items while an adult writes down what they see. Take LOTS of pictures for a great display of your scientists in action!
Christmas Bird Feeders
Materials Needed: Pine cones, instant oatmeal; birdseed; ribbon; wax paper
Children roll pine cones in a tray of instant oatmeal and then in birdseed. Tie a ribbon to the tip of the pine cone to hang it from. Let dry on wax paper. Children can take them home and hang them in a tree outside as a Christmas gift for their winter birds!
CAUTION: Please, do NOT use peanut butter for this activity. Not only are many children allergic to peanuts, but the birds can choke from peanut butter!
Mystery Gift Wrap
Materials Needed: assortment of textured items such as cotton (poly-fill), sandpaper, fur, shiny paper, etc; poster board; glue
Prepare in advance equal sized squared from the poster board.
Cover 2 squares with each textured material you have a set of each texture.
Attach one set of the squares on a large poster board for the children to see.
Place the second set into a Mystery Box or drawstring bag.
1. Allow each child to feel each square on the poster board and describe what they feel. Tell them what the material is.
2. Give each child a turn to reach into the box or bag and feel the first square their hand touches.
3. Based on the touch and looking at the poster board, they should try to guess which texture they are feeling.
While children are feeling one in the box or bag, ask questions about what they are feeling: Is it soft? Hard? Bumpy? Etc.
EXTENSION: Leave this activity out in your Science or Discovery area for the children to use during the day.
Writing Activity Ideas for Your Preschool Christmas Theme!
Christmas Card Station
Materials Needed: Card stock paper in red and green, markers, Christmas stickers; papers with seasonal sayings on them (Merry Christmas! Love one another!); hole punchers; ribbon
Children should decorate how they want. Show them how to hole punch the top and tie a ribbon (not in a bow...just let them practice making knots!).
Extension: These cards could be used to send to a Nursing Home or other Service Projects
Candy Cane Patterns
Materials Needed: Candy Cane shape drawn on construction paper with one bold marker line; red and white construction paper squares; glue sticks; marker
Encourage children to print their name on the paper. Encourage them to make an AB pattern with the white and red squares by gluing them, in an AB pattern, onto the bold line to make a candy cane.
Christmas Trees
Materials Needed: green paper, scissors, Christmas theme stickers, markers.
Have children cut the green paper into the shape that THEY want their Christmas trees to be (accept ANY shapes they make. Do not insist on triangle shapes! Some trees are full, narrow, short, tall! And, the goal of this activity is using scissors...with art, it is always the process NOT the product or outcome!).
Encourage the children to print their name on their tree and then allow them to decorate how they want with the stickers and markers.
Christmas Gift Ideas
Pine Cone Tree
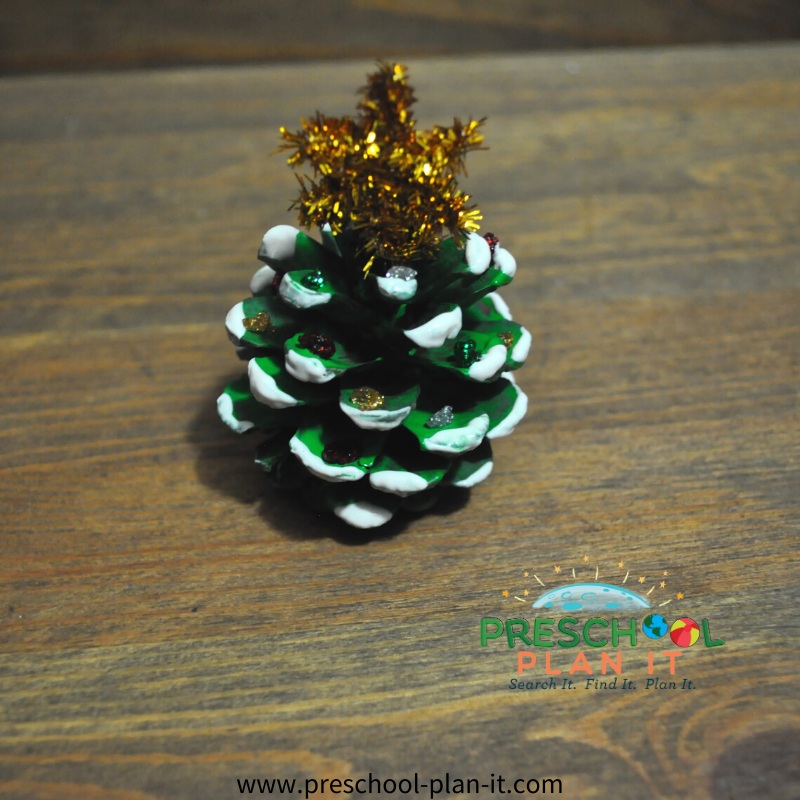
Materials needed: Scented pine cones (available at craft stores with a cinnamon scent); glitter glue; mini colored pom-poms; plastic stars for top of trees; plaster of paris; waxed paper cups for base.
Click here for directions and pictures of the Pine Cone Project
Picture Frame
Materials Needed: Picture of each child, picture frame to decorate.
Picture frame ideas:
Glue craft sticks in the shape of a Christmas Tree or a Gift Box. Have children decorate with glue and glitter. Glue their picture to a piece of heavy colored paper (card stock). Glue picture on with a glue stick--white glue (like school glue) will make the ink from the picture run! Glue card stock on back of picture frame so that it can be seen from the front. Hot glue or use tacky glue to attach a ribbon to the top so that it can be hung from a Christmas tree.
Help children to make a Christmas wreath shape out of their handprints. Glue their picture, in a heart shape, into the middle.
Home made Cocoa Mix
Items needed: Small jars with covers (1 for each student); powdered nondairy coffee creamer (1/2 cup for each student); sifted powdered sugar (1/2 cup per student); unsweetened cocoa powder (1/8 cup per student); candy canes (1 1/2 per student--already crushed with rolling pin); 1/2 cup measuring cups, 1/8 cup measuring cups.
Set up a "cooking station" on a table with each of the ingredients in a row. From left to right have: Jars, bowl of powdered coffee creamer with measuring cup in it, bowl of sifted powdered sugar with measuring cup in it; bowl of unsweetened cocoa powder with measuring cup in it; baggies with crushed candy canes; covers to jars.
Instruct the children to put one cup of each into their jar. Instruct them to empty the crushed candy cane into the jar. Cover the jar and shake, shake, shake!
Make HOW TO MAKE cards to tie around jar. Combine 1/4 cup of mix with 3/4 cup boiling water; stir well, drink!
Potpourri Sachets
Materials needed: Netting; rubber bands; potpourri (purchase at craft store--preferably holiday scents like cinnamon, vanilla, etc.); ribbon strips.
Cut netting into circles approximately 12-14 inches. Scoop a bunch of potpourri into center. Help children gather the netting and attach a rubber band at top for them. Encourage them to tie knows in the ribbon (you can add a bow when they are done). Add basic Gift Tags that the children have written their names on.
EXTENSION: Many craft stores sell clear, round, plastic ornaments very inexpensively. Place potpourri into ornaments, close ornament and add a ribbon to the end. Write "Merry Christmas! Love, __________(child's name)" on the ornament--It is preferable to encourage the children to write their name on the ornament.
Tree Ornaments
Materials Needed: White snowflake doilies (or round, white coffee filters); silver cupcake liners, small, round picture of each child, sequins and/or seasonal stickers, glue, glue sticks, ribbon
Instruct children to glue their picture on the cupcake liner using a glue stick (glue will make the ink from their picture run if you printed them on your printer). They then glue liner onto the doily or coffee filter. They then glue sequins/stickers onto the silver liner. Tie a ribbon on the top (so that it can be hung from the tree of the recipient). Write the year on the back of the ornament.
Reindeer Ornament
Materials needed: White construction paper; brown finger paint-mixed with a small amount of white school glue (only add a small amount. Too much will cause the finger paint to become amazingly thick); large wiggle eyes; pre-cut round black circles for noses; finger paint paper.
Help children to place their hand (fingers- but NOT their thumbs- and palms) into the paint and press their hand on the white construction paper. Set hand print aside. Provide finger paint paper so they can just have fun with the finger paint!
When they are finished finger painting and washed up, give each child 2 wiggle eyes and a round black paper to add onto their hand print for a reindeer. The fingers are the antlers and the nose should be somewhere on the bottom of the palm print for the nose.
TIP: If possible, encourage the children to separate their index and middle finger a little bit away from their ring & pinky fingers help define the antlers.
When dry, hole punch the top and add a ribbon to hang the ornament. Print the child's name, age and the date on the back.
Miscellaneous Ideas
In this section, you'll find ideas for Field Trips, Christmas Service Projects and Special Day Events!
Christmas Theme Field Trips
Local Tree Farm
Visiting the tree farm to see the different types and shapes of trees. Ask if they will donate any branches that have fallen for your art projects and science area! Also, take a picture, if possible, of each child standing next to a tree he or she likes! Ask them why they like that particular tree! Write down what they say.
Print the pictures and glue onto an 8 1/2 X 11 paper and write each child's name and what they said at the farm on the bottom to make a class book "Our visit to the Tree Farm". Read it at circle time and then place in your library area. This will be a book they will "read" over and over again!
Neighborhood Walk
Take a walk around your school and look for signs of Christmas--lights, decorations, etc.!
Visit The Bakery
In advance, contact your local supermarket that has a bakery section or a local bakery. Arrange a time for your children to come in and perhaps sample a Christmas food or two!* Be sure to purchase something from the local bakery for snack!
If you have any allergies in your classroom, I would not suggest this field trip. Even though a food you sample may have not peanuts, for example, in it, the mix may have been made in the same bowl that peanuts were in. This is called cross-contamination and is a huge culprit of many allergic reactions.
Holiday Theme Service Projects
December by Eve Bunting
This story helps introduce the concept of helping and giving during this season. You will need to paraphrase it for this age group. It is about a boy and his Mom who live in a cardboard box but see that there are others that are in a worse position than they are. They invite someone to move into their box on Christmas.
Coat Collection
In our state, a dry cleaners collects coats for those in need. It began as a Coats for Kids program and grew into coats for all ages. The coats need to be in wearable condition (no buttons missing, zippers working, no rips). The cleaners will clean and distribute the coats. Call your local Dry Cleaners to see if they will sponsor this type of event. If they won't, do it on your own! Collect coats from families--request that they be in wearable condition and already cleaned. Donate them to the local homeless shelter.
Homeless Shelter Helps
Contact the local homeless shelter (preferably in November so that you have time to plan this!). Find out what they are most in need of and collect those items all month long...or all year long! This could be a food drive, a diaper drive, find out what they need!
Another idea is to have the children each bring in a vegetable or item to make a home made soup. Cook it during the day in a crock-pot and deliver it to a soup kitchen that evening. Parents could also make or purchase bread to deliver as well to go with the soup.
Greetings to the Troops
Have the children make Christmas cards at your writing center. Speak with a local recruiter's office to have them mailed out.
Greetings to Nursing Home Residents
Donate homemade cards to a local nursing home or assisted living program.
Christmas Theme Special Day Events
Christmas Party
Plan a day where your children can sing their favorite Christmas Songs together. We plan this in advance so that families are invited to their "Christmas concert"! It is literally a 5 minute "program"! The children sing their favorite songs in front of their families and then we all enjoy refreshments and snacks together. We have a sign up sheet for refreshments ahead of time for parents to provide snacks and drinks.
Extension: Have an assortment of the children's art work from the month prominently on display during the event!
Pajama Day
Send notices home in advance to the families to send their children into school in their pajamas! They can bring in their favorite stuffed animals if they want as well! Provide hot chocolate, popcorn or fruit salad and just have a laid back day reading seasonal stories, listening to Christmas music.
EXTENSION: One of our very talented teachers made a "fireplace" which she painted on large paper. It is hung on the wall with some stockings (preferably child made with construction paper) hung on the "mantel". She tapes "flames" in the opening of the fireplace.
Each year, we take a few class group photos with all the children in front of the fireplace. The parents LOVE these pictures. Also, you could use the pictures in a Picture Frame Gift click Here for Christmas Gift Ideas


Hey there! Welcome to Preschool Plan It! I’m Cheryl, a preschool teacher of over 20 years.
I KNOW, I know, you spend hours of time developing your preschool themes, activities and preschool lesson plans each week. You are commited to planning preschool themes and activities that are engaging hands-on, interactive, fun AND meet the goal of supporting each child’s level of growth and development.
I am commited to providing you, the preschool teacher, with everything you need to develop preschool lesson plans and preschool activities for your classroom all in one place!
READ MORE
Join My Free Preschool Teacher Tips Newsletter
You’ll receive a weekly email with planning tips and teaching ideas.
You'll also receive (on the 1st of each month) a free theme starter pack with some printables and activity ideas to get you started planning a theme!Join Now and Get Your First Theme Right Away!
© Copyright 2010-2025 Preschool-Plan-It.com | All Rights Reserved | Privacy Policy & Disclaimer
- Preschool Teachers
