- Theme Packs
- Themes
-
Preschool Planning
- Preschool Teachers
Transportation Theme Activities for Preschool

A Transportation preschool transportation theme is a traditional topic in most preschools but why?
Preschoolers love activities that include playing with all types of transportation theme items including vehicles such as cars, trucks, airplanes and more.
This topic is part of their everyday lives.
They drive or walk to school, have seen or ridden on a bus or taken an airplane to go on vacation.
This natural interest in transportation is something they experience in their lives brings life to the theme and your preschool classroom.
Preschool children learn through play.
Providing hands-on activities in all of the Interest Learning Centers in your classroom with a theme in mind will draw them in to play and learn!
This Transportation Theme page is filled with preschool activities and ideas for all areas of your classroom.
Let the Transportation Theme planning begin!
You can either scroll down through this page to see all of the preschool activities for your transportation theme or click the link below to go to specific preschool activity types you are looking for.
Transportation Theme Art
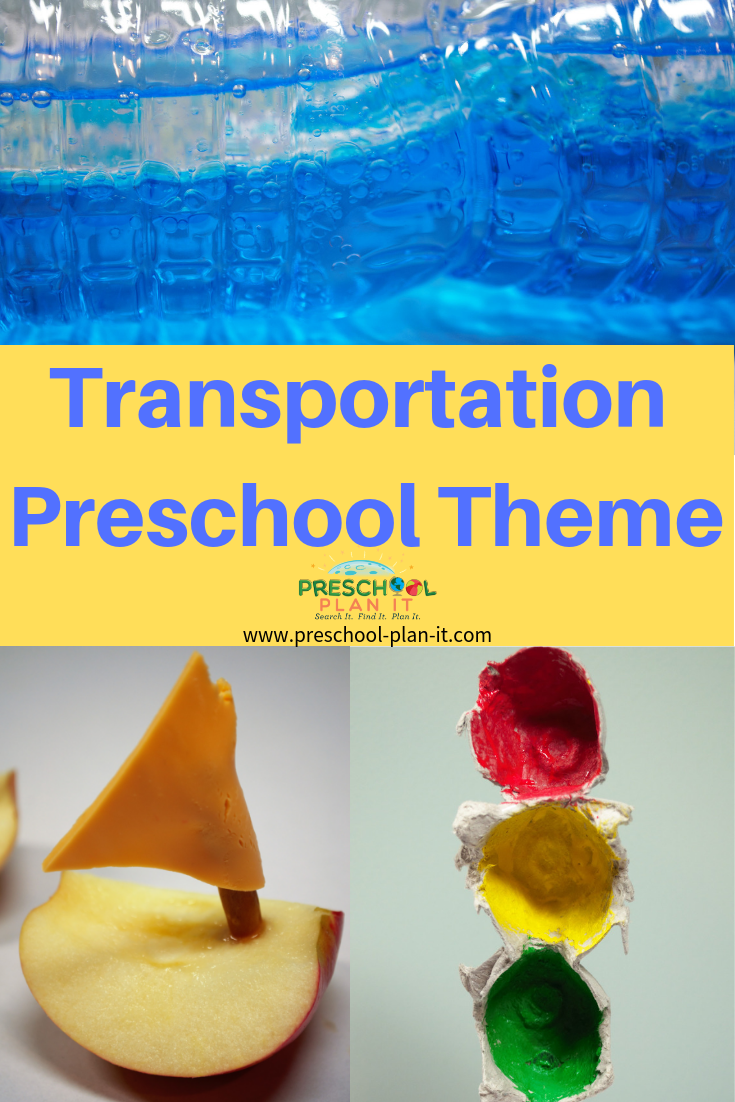
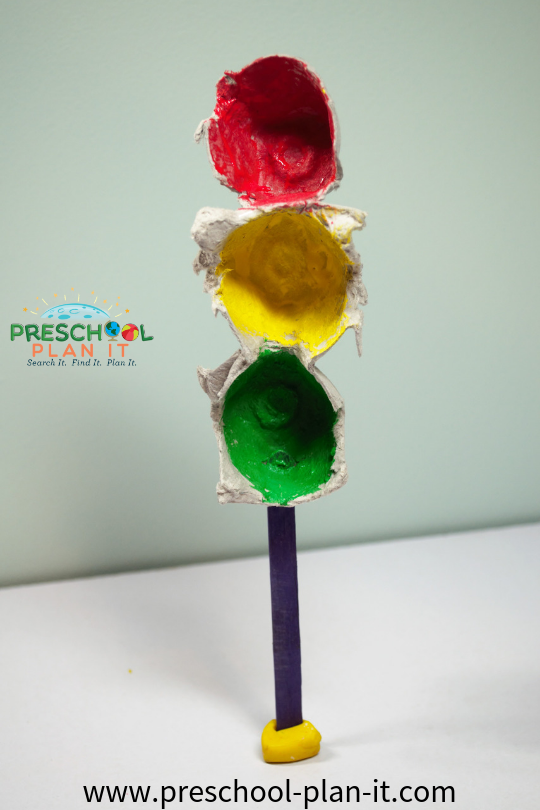
Traffic Lights
Materials Needed: Cardboard egg cartons (in sections of 3); craft sticks; paint; clay
Provide red, yellow and green paint. Place craft stick into bottom. Once painted, place stick into a piece of clay as a base. These are great to use with cars, trucks etc. or in the block area!
Monster Trucks! Thank you Lisa B. for this idea!Monster trucks! My children can't get enough of reading about them and playing with them.
We did an art activity with paint. They drove the trucks through the paint onto the paper. They loved it!
Also, they like to drive the trucks through shaving cream mixed with brown paint!
I haven't done this yet, but, I thought if I used a Monster truck template, I could have one of each color. They could count them also!Hot Air Balloons
Materials Needed: Round balloons, watered down glue (or other paper mache recipe you like), strips of newspaper, colored tissue paper, yarn, colored paper or strawberry baskets
Help children (if needed) to cover balloon with at least one layer of newspaper. It may be easier if you encourage them to completely "paint" the balloon with the glue or mache liquid and then cover with strips of news paper and then "paint" over the newspaper.
(Preschoolers tend to give up quickly when they have to pick newspaper out of a tray of glue and water. It is a lot of fine motor activity for them all at once.). After a layer is covering balloon, encourage them to place colored tissue paper over the newspaper and re"paint" with glue.
Let dry for several days. Pop balloons (favorite part in our classroom!). Hole punch a hole on each side of the opening of balloon shape. Using yarn, Tie strawberry baskets onto balloon shape (or have children paint paper to make their own baskets and tie them on).
Extension: Hang Hot Air Balloons in classroom. A great story to read before making these is Altuna Baboona or read the story after they are hung up (or both!). Encourage the children to tell a story of where they would go in their hot air balloon!
Additional Extension: Make a class book of the children's hot air balloon stories complete with a picture of them holding their balloon!
I Think I CanMaterials Needed: Construction paper; watercolor paint; pre-cut wheels; pre-cut conversation bubbles that say "I think I can!" Ask them where they would travel to if they could go ANYWHERE they wanted! Write down their answers on a piece of paper for later reference! You are going to make these into trains later!
Have the construction paper out with the paints and just let the children paint! When they are done and dry, give them wheels to glue on as well as a conversation bubble.
Write down on each child's train where they said they'd like to go!
Use these to make a classroom book to read over and over throughout the year labeled "Where we'd like to go!". Use these to make a "border" on your classroom wall or bulletin board.
Variation: Instead of asking where they'd like to go, talk with them while they are painting about what they'd like to learn, or be when they grow up!
Write down what they say for your own reference. When these are dry, add wheels to the bottoms and the "I think I can" bubble to each one. Hang them on a wall or bulletin board with a large title called "WE KNOW WE CAN" or "WHAT WE WANT TO BE WHEN WE GROW UP" or some other saying.
Transportation Theme Block Center Ideas
Home Made Blocks and Transportation Theme Vehicles
Collect boxes of different sizes (from families or your own recycling from home!) including cereal and other food boxes, gift boxes, etc.
Wrap them in brown and colored paper.
Encourage children to make them into houses (by drawing windows and doors), transportation theme vehicles and boats (by drawing wheels and windows for cars and trucks).
Help the children use them along with the blocks already in your block area to build cities and towns. Don't forget to add an airport or lake!
Transportation Theme Circle Time Ideas
Circle Time is such a great time for children to learn the social skills of being together as a large group AND to learn more about your Transportation Theme!
How We Travel
Materials Needed: Large chart paper; Marker
Prepare in advance a large piece of paper separated by lines into 2 columns, with the left column being not as wide as the right column. Label the chart How We Travel
In the right column, draw pictures (or glue on pictures) of different ways the children might travel (car, truck, van, bus, horse, airplane, etc.).
During Circle Time, show them the chart and read the label. Ask if any of the children have ever traveled in a car. Write down the names of the children who have in the right hand column. Continue this for each mode of travel you have listed.
Extension: Help your children with name recognition by preparing in advance pieces of paper with each child's name on it. Make enough name tags for each child to be able to put their name next to every mode of travel (just in case they have traveled on each type!). When asking if they have ever traveled by car, have them glue or tape their name next to the picture of the car. Continue for each mode.
Extension: Add a third column to the right of where the children's names will be. When done with this activity, have the children help you count the names next to each mode of travel and write that number in the box to the right. When completed, ask which row has more (or ask, which is more 10 children or 6 children). This extension activity can be done later in the day or on another day rather than all at one sitting.
Show and Tell Materials Needed: Transportation Theme Toy or vehicle from home from each child.Send a letter home in advance announcing "Transportation Show and Tell Day" to the families.
Ask children to place their Show and Tell item behind their backs. Take turns asking each child to show the item they brought in and encourage them to tell their friends about it.
Note: Some children are not sure what to say! This is a GREAT opportunity to help them to develop their group speaking and social skills. Our goal for Show and Tell is for the children to share information about something of theirs in order to get to know each other better! A personal Show and Tell time is great for this! However, if there is concern about bringing items in from home (such as concerns that it will get lost or broken), rather than ask families to send something in, take the children on a Show and Tell hunt in your classroom and have them choose ONE transportation item from the classroom to bring to Circle Time to talk to their friends about.
Be ready with some questions such as "Does it work in the water? Does it have wheels? Where would you go if you could travel on that?"
Additional Note: Some children will forget to bring in a show and tell, it's inevitable! Encourage that child to choose their favorite transportation item from the classroom. When it is their turn, in addition to questions about the item itself, ask why they like to play with that one in school.
Flannel Board Sorting
This activity is much like the Water, Land, Sky activity listed in this section.
Materials Needed: Flannel pieces of transportation theme vehicle items; flannel board
You can make pieces from felt in advance. You can also laminate pictures of items and glue a piece of flannel to the back. Some teachers have found that using a piece of a fabric softener sheet on the back works just as good as felt and is less expensive!
Show the flannel board. Teach them spatial relationship words by explaining that the sky is on the TOP, the BOTTOM is the road or ground and the SIDE (add some blue for water to the side) is the water.
Give each child a flannel piece. Take turns asking what item they have and invite them to place their piece on the board where it would travel. Ask them "Would your airplane go in the air on TOP, on the ground in the MIDDLE or in the water on the SIDE?
Extension: Make a duplicate set of what you have. Give out one piece of one set to the children and keep the duplicate set. Show one of your pieces. Ask the children what it is. Ask them WHERE it should go on the board. Place it on the board. Then invite the child with the matching piece to come up and place their piece NEXT TO yours.
Extension: Place the board and the pieces in your Library Area for the children to use during Center Activity Time.
Snack Recipe Ideas to Cook Up for Your Transportation Theme
Cooking with children helps develop their math skills and helps them to learn how to follow directions.
It also allows for some great conversation!
Ask many questions while cooking with your children to encourage conversation!
Be sure to ask specific transportation theme questions while making these fun snacks!
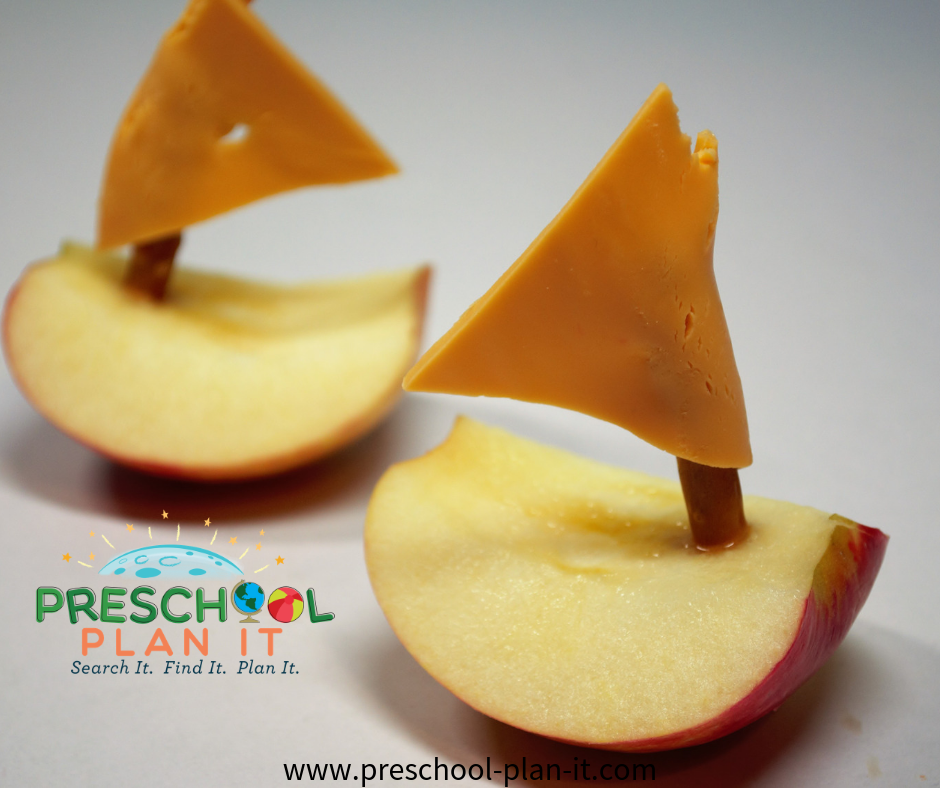
Apple Boat
Ingredients and Items needed: Apple, slice of cheese, mini pretzel stick.
Core the apple, do not slice. Slice the apple into 4 quarters. Slice cheese into 4 triangles.
Have children place a pretzel stick into the apple quarter. Wrap a cheese triangle around the top of the pretzel for a sail.
Cracker WheelsIngredients and Items needed: Round crackers, cheese spread or cream cheese, a red pepper sliced into thin strips, plastic knives.
Supervise the children as they cut the pepper strip into small pieces. Encourage them to spread the cheese onto crackers and then sprinkle some cut peppers on!
Talk about what they have learned during your Transportation Theme as you eat snack together!
Traffic LightsIngredients & Items needed: Graham crackers, cheese spread or cream cheese, apples (red, yellow and green), plastic knives.
Cut apples so that you cut 4 sides off of the core. Then cut into circle shapes. Give each child a whole graham cracker (rectangle) for the traffic light post.
Supervise them as they spread cheese onto cracker.
Give each child one red, yellow and green apple circle to place on the cheese in the order of traffic lights.
Banana BoatsIngredients & Items needed: Bananas, yogurt, small cups, plastic knives, spoon.
Help children to cut the banana in half both lengthwise and width wise. They should spoon yogurt into their cup and then place 2 pieces of banana on each side of the cup.
Travel Trail MixIngredients and Items needed: cheerios, raisins, pretzels and other healthy snacks each in their own bowls; a spoon in each bowl; plastic baggies
Children place one spoonful of each item into their Travel Snack Baggies
Covered Wagon Wheel PancakesIngredients: For pancakes: 2 cups flour, pinch of salt, 2 well beaten eggs and milk; banana slices and strawberry slices. For butter: 1 pint of whipping cream, glass jar with cover (such as a baby food jar).
Make the pancakes with the children. Have children each put an ingredient in. They all love to be part of the cooking process! If necessary, due to the number of children, simply have each child add 1 spoonful of the flour into a bowl until they have all had a turn! With the children, stir the ingredients until smooth. Spray or oil a pan and cook pancakes for snack.
Make butter! Pour whipping cream into a glass jar (only fill jar 1/4 to 1/2 full). Cover jar and shake! Be sure all the children have a turn and be sure to help as well. As cream solidifies, pour out some of the excess liquid and then continue shaking. It will eventually become a yellow solid of butter! Add a bit of salt to flavor if desired.
Have children decorate their own pancake with the fruit. Encourage the children to spread some of their home made butter on their pancake and top with the fruit!
Bubbly DrinkCombine 12 ounces of frozen apple juice concentration, 3 cups of water and 1 liter of club soda. Great way to cool off after a car wash!
Like What You See So Far?
Join my FREE Preschool Teacher Tips Email Community today and receive:
Weekly tips and planning ideas!
And, on the 1st of each month I'll email you a free
theme starter pack that includes a printable activity mat or game,
Calendar pieces, a playdough recipe and a song poster!
Join NOW and I'll also send you the theme planning forms I use!
It's all FREE? You in?
Just tell me where to send your goodies below!Transportation Theme Ideas to Transform Your Dramatic Play Area
Vacation Station
Materials needed: Chairs for an airplane, bus, boat or train; pretend food and trays, backpacks, suitcases, extra clothing; paper and markers to make tickets; hold punchers to punch tickets as passengers board.
DMV (Department of Motor Vehicles)Turn your dramatic play area into the DMV! Hang a chart with alphabet letters on the wall for eye tests. Have a list of questions on a clip board (such as How old are you? What color are your eyes? What is your first name? What is your last name?, etc.). Set up a picture booth (hang a piece of fabric on the wall, a chair near the wall and a pretend camera to take pictures (or a real one for you to take their pictures!). Provide a piece of paper for their Preschool License. Develop it to look similar to your state's driver's license.
Before "approving" a child for a license, have them complete an obstacle course either with a car made from a box (see Gas Station above in this section) or with a small, toy car in their hands. Set up a course that challenges the gross motor areas you are working on (jumping 2 inches over a rope, crawl through a tunnel, balance on a beam, catch a ball, etc.).
Travel AgencyObtain travel brochures from local travel agencies. Also look for maps and other items for your Transportation Theme dramatic play area! While you're at it, ask the travel agency manager if they have a staff member that would come to your preschool group to talk about their job and bring brochures, etc. If you are willing to send some information home from the agent, they should be willing to donate their time!
Set up your area with a table for a desk, clipboards, pictures, pens, pencils, paper, perhaps a keyboard that someone is not using for them to "type" into.
Also provide paper and markers/crayons for the children to make tickets and their own brochures!
Transportation Theme Ideas for Your Easel--
More Than Just Painting!Painting
Materials Needed: Tempera Paint and brushes. Instructions: NONE!
That's right, none! Remember that just because we have a set transportation theme for a week or more, does not mean that ALL activities have to revolve around it! Children at this age are beginning to experiment with representational pictures, but are not quite there yet! Be sure to allow activities where they can just explore and use materials such as painting just to paint and cutting paper just to cut paper!
Transportation Theme Large Group Games To Help Your Preschoolers Build Their Muscles While Having Fun Together!
Stay on the Road!
Use chalk to draw roads for the children to ride their ride-on bikes or cars on. This can be done outside or inside. If you do not have child size ride on cars or bikes, have the children drive toy transportation theme vehicles within the roads.
Extension: Provide stop and go signs, have one of the children become a traffic office to stop traffic and let them go again!
Musical Transportation Theme Chairs In advance, make a set of papers with transportation theme items on them. Make 2 of each. Include pictures of cars, trucks, buses, horses, people walking etc.Place the same number of chairs back to back that there are children in your group.
Place one card in each chair. Give a matching card to each of the children.
Explain that when the music is on, they should all walk around the chairs and look for their matching card, but don't touch it, keep walking. Tell them that when you stop the music, you will yell "Time to Park!" and they should find the matching card in the chair and sit on that chair.
Show them the direction you want them to go when the music is playing or they are walking (so they don't bump into each other!).
Start the music and play. Play as many times as there is interest. This is a NON competitive game. Competition at this age can be unhealthy. The purpose of games at this age should be to promote social skills and following directions, not "winning" or being "better"...promote teamwork!
Extension: Instead of using chairs and music, try no music and blowing a train whistle when they are to find their chairs.
This game can be played outside or inside. When outside, instead of moving chairs outside, draw circles with chalk for them to sit in!
Transportation Theme Ideas for Your Library & Literacy Area
Books Suggestions
(I LOVE Amazon, and some of the links below will take you to the Amazon website. If you do choose to purchase yours through Amazon, they do send me a few cents--which supports my coffee habit! )
Altoona Baboona by Janie Bynum
Barney's Big Balloon: A Hide-And-Seek Adventure by Mark Bernthal
The Berenstain Bears Bears on Wheels by Stan Berenstain
The Boat Book by Samantha Berger
Bumper To Bumper by Annie Owen
Cars! Cars! Cars! by Grace Maccarone
Down by the Station by Will Hillenbrand
Engine, Engine, Number Nine by Stephanie Calmenson
Finding the Titanic by Robert Ballard
Go, Dog. Go!: P.D. Eastman's Book of Things That Go by P.D. Eastman
Ghost Liners by Robert Ballard
Into the Sky by Ryan Ann Hunter
I've Been Working on the Railroad by Nadine Bernard Westcott
The Little Engine That Could by Watty Piper
The Little Old Train by Margaret Glover Otto
Little Red Caboose by Jill Dubin
Machines at Work Board Book by Byron Barton
Mike Mulligan and His Steam Shovel by Virginia Lee Burton
Railroad Toad by Susan Schade
Sailaway Home by Bruce Degen
Thomas the Tank Engine's Big Blue Treasury (Thomas the Tank Engine & Friends) by Christopher Awdry
Trains by Gail Gibbons
Library Wall Transportation Theme Decor
Hang pictures on the wall of different modes of transportation including walking, horses, hot air balloons, trucks, etc.
Obtain brochures from local car dealerships, travel agencies as well as on the internet.
Transportation Theme Activities To Help Your Preschoolers Develop Their Small Muscles and Their Math Skills!
Transportation Theme Vehicles
Provide different types of small manipulatives that can be used to make vehicles or cities! This may include Bristle Blocks, brick blocks, K'nex, Magnet Blocks, etc.
Transportation LacingProvide the children with Transportation Theme shapes that are hole punched around the edges and yarn (tie a knot on one end of the yarn). This is great practice for using their small muscles and helps build eye-hand coordination.
These cards can be purchases or you can make them yourself. Make a shape the transportation theme shape on a piece of thin cardboard (the back of a pad of paper or notebook covers work well) or stock paper. Punch holes around the edges no more than 1/4 inch apart from each other. Laminate the cards.
For lacing string, shoe laces work great! Or, you can make your own by using yarn and taping one end to make it easier for the yarn to go through the hole.
Your Turn, My TurnMaterials Needed: Manila folder, transportation theme vehicles for moving pieces, rolling dice.
In advance, prepare the manila folder. Open the folder and draw lines across the folder (across the shorter side) all the way down the folder, about 1 inch apart.
Also prepare a dice. cover the dots that have 3-6 on them and have only dots with 1 and 2 on them.
This is a 2 person game. The purpose is to work on small hand muscles, eye-hand coordination while practicing taking turns.
To Play: Each of the 2 children should choose a Transportation Theme manipulative (car, boat, etc.). One child rolls the dice and moves his car that many rows toward the other child. The second child then rolls the dice and moves her item that many rows toward the other child. During play, remind them whose
turn it is. "Your turn. Now it's his turn."
Extension: Use a dice with colors instead and tape colored strips of paper on the rows. Extension: Make a homemade spinner with numbers instead of using dice.
Vehicle Patterns
Make cards of transportation theme items such as cars, trucks, buses, children walking, horses, etc. For patterning, you will need multiple of each type (10 of each). Laminate them for durability. Encourage the children to make patterns with them (car, car, truck; car, truck, bus, car, truck, bus)
Extension: Take 2 of each type out of the set you made. Play a matching game with them with the children.
Extension: Add felt or velcro to the backs of the cards and have them out near a flannel board.
Variation: Rather than make cards for patterning, use transportation theme plastic sorters to make the above patterns.
Match the Car with the GarageIn advance, turn identical small boxes into matching garages (for example, clean empty juice boxes or milk cartons with brown paper. Tape numbers or number words on each garage. Tape corresponding numbers on toy cars.
Encourage the children to drive the cars into the correct garage.
Transportation Vehicle SortingProvide a large assortment of transportation theme items and bowls. Allow children to sort by the different attributes that they see. You can upgrade this by putting names to each bowl. Some ideas are to sort by:
Land, Sky and Water vehicles
Items with wheels and without wheels
With wings and without wings
Transportation Theme Music & Movement Activities to Get Your Preschoolers Movin' and Groovin'!
Red Light-Green Light...With A Twist!
Play a game of "Freeze Dancing" with them using traffic light information!
Materials Needed: CD/Cassette Player and music; A piece of red paper, yellow paper and green paper; a large open space.
Talk with the children about traffic lights (red means stop, green means go, yellow means to go really slow..ready to stop). Tell the children they will be dancing to the music but need to watch you (you are the traffic light!). When you put up the Green paper, they should dance, when you put up the Red paper, they should Stop (Freeze).
Variation: Have songs on a CD that vary in tempo: some slow and some fast. Tell the children to dance to the beat- some will be fast and some will be slow. When the music stops, they should Stop (freeze!). Play the music. If it is fast, hold up a green paper, hold up yellow if it is slow.
Stop the music now and then for them to freeze and hold up the Red paper. When playing the CD, only play each song for about 15 seconds and then change it!
Play as interest continues. We have also added dancing scarves or pieces of fabric for them to sway and dance with during this.
Transportation Theme Ideas for Your Sand & Water Table
Let's Drive!
Materials Needed: Cars, trucks, any vehicles with wheels!; Mud or shaving cream.
Children love to push these items on or through mud or shaving cream in your Sand and Water table! Comment on the tracks they make. Ask where their vehicle is going and what it is doing!
Sink or Float
Materials Needed: Water; transportation vehicles (Find vehicles that sink as well as vehicles that float.)
Give each child a vehicle. Take turns asking each child if they think their vehicle will sink or float? Invite them to put their vehicle in the water table to find out. Once all the children have had a turn, allow them to just play at the water table with the vehicles.
Extension: Make a rebus chart (picture chart) of the vehicles you will be using. Using a large piece of paper, make 3 columns. Label the first column TRANSPORTATION MODE. Draw a picture in this first column of each mode of transportation (I'm not a great artist so I either take pictures of each item, print the picture and glue it in the column or print out clip art!). Label the second column SINK and label the third column FLOAT
Ask the children if they think the first item pictured will sink or float. Count aloud how many children think it will sink and list that number next to the picture under the SINK column. Then ask how many children think it will float and list that number next to the item under the FLOAT column.
Drop the item in the table (or have a child do it). Ask if it sank or floated and discuss their guesses!
*Many children will "vote" twice because this is a new concept for them! A way to avoid this is to ask all the children who think it will sink to stand on "this side" of the water table if they think it will float to stand on the other side. Then count the children and list on the chart.
You may want to laminate this chart before using and use dry erase markers on it. Then you can use it each time you have a transportation theme.
Transportation Theme Science Activities for Your
Preschool Scientists in Training!Oceanic Bottles
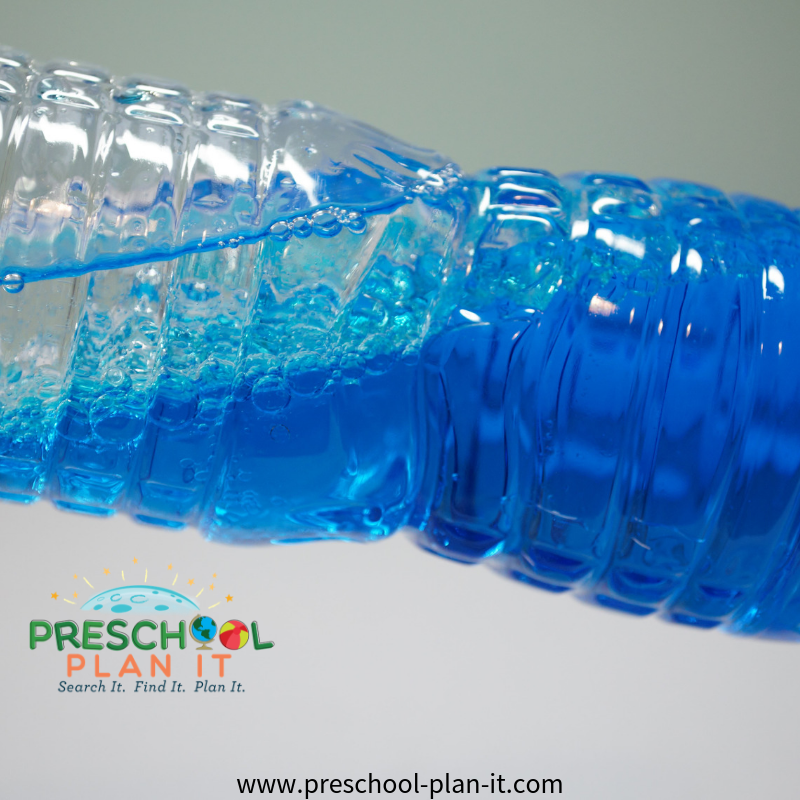
Fill a plastic bottle plastic bottle (we use smaller bottles such as 1 liter bottles. The 2 liter bottles are difficult for the children to manipulate.
Fill 2/3 of the way with blue colored water and the other 1/3 with mineral oil. Hot glue the cap on.
Show the children how to move it to make waves in the bottle.
Extension. Use bottles with a large mouth opening (like a juice bottle). Fill 3/4 of the way with water and color with blue food coloring. Add sand. Add small transportation theme items. Hot glue cover on and let the children search for the items by moving it around!
Air BalloonMaterials needed: Small plastic bottle, 1 tablespoon of sugar, water, 1 packet of yeast, one small round balloon.
Put sugar into bottle.
Fill 1/3 of the way with water.
Add the packet of yeast.
Mix (lightly shake until mixed).
Cover bottle with the balloon.
Watch bottle over the next 1/2 hour.
Note: The yeast consumes the sugar and then creates carbon dioxide gas which fills the balloon!
Writing Activity Ideas for Your Preschool Classroom's Transportation Theme
Transportation Theme Class Book
Materials Needed: Magazines, scissors, glue sticks, construction paper, markers or crayons.
Children cut out modes of transportation. They glue them on a piece of paper. Ask them about their pictures and write down exactly what they say. Have them write their name on their page. Staple all of the children's pages together to make a Class Book.
Extension: Glue a picture of the child on their page. Place the book in the Library area. Children love to read books with pictures of themselves!
Miscellaneous Activities for Your Preschool Classroom's Transportation Theme!
Transportation Theme Field Trips
Local Service StationContact a local gas/mechanic service station to plan out a field trip. Also, ask if they have any old hoses, spark plugs, etc. that can be cleaned and used in for the children to explore in the classroom perhaps in the Science Center.
Airport VisitIs there an airport near you? Small, municipal airports can be a great visit, especially if you can time it so that the children can see some airplanes or helicopters land!
Horse StablePlan a visit to a local Horse stable or a local community member who owns a horse.
Local FarmVisiting the farm is not just for your Farm Theme! A lot can be seen with a Transportation Theme in mind! Of course you will visit the farm animals while you are there! However, in advance, speak with the farmer or owner of the farm to arrange having the vehicles they use at the farm including tractors, wagons, horses and their pickup truck!
Transportation Theme Classroom Visitors
There are many opportunities with a Transportation theme for visitors to your classroom! Survey parents for opportunities as well as your local community!
Some ideas for visitors:
Truck Driver
Bus Driver
Police Office
Fire Truck Driver
Airplane or Helicopter Pilots
Horse Owner
Other Pages You Might Like:
Go to MAIN THEMES Page for more theme ideas!
Go to Preschool Plan It's Home Page


Hey there! Welcome to Preschool Plan It! I’m Cheryl, a preschool teacher of over 20 years.
I KNOW, I know, you spend hours of time developing your preschool themes, activities and preschool lesson plans each week. You are commited to planning preschool themes and activities that are engaging hands-on, interactive, fun AND meet the goal of supporting each child’s level of growth and development.
I am commited to providing you, the preschool teacher, with everything you need to develop preschool lesson plans and preschool activities for your classroom all in one place!
READ MORE
Join My Free Preschool Teacher Tips Newsletter
You’ll receive a weekly email with planning tips and teaching ideas.
You'll also receive (on the 1st of each month) a free theme starter pack with some printables and activity ideas to get you started planning a theme!Join Now and Get Your First Theme Right Away!
© Copyright 2010-2025 Preschool-Plan-It.com | All Rights Reserved | Privacy Policy & Disclaimer
- Preschool Teachers
